How to Clean Retainers?
Struggling with cloudy, foul-smelling retainers that frustrate your patients and increase return rates? Improper maintenance ruins high-quality dental appliances fast. Let’s solve this hygiene bottleneck to ensure long-term clinical success.
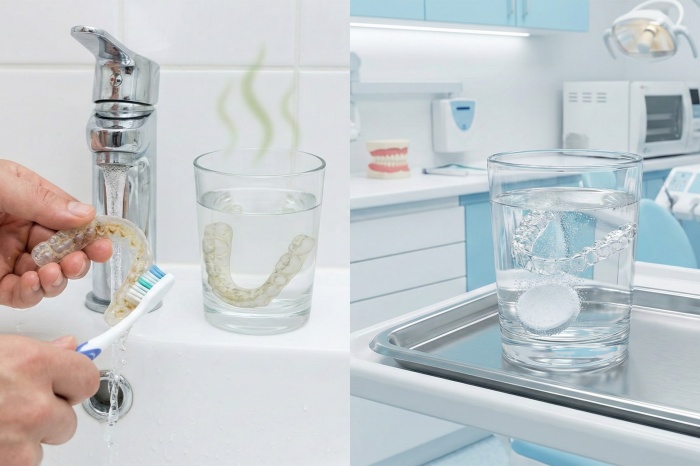
To clean retainers effectively, rinse them immediately after removal and brush gently with a soft-bristle brush and non-abrasive soap. For professional-grade hygiene, soak them daily in retainer cleaning tablets to eliminate 99.9% of odor-causing bacteria and stubborn plaque without damaging the material.
Maintaining oral appliances shouldn’t be a guessing game for your clients. As industry experts at ITS Dental Care Products, we’ve seen how poor cleaning habits lead to costly replacements. Read on to master the professional standards of retainer care.
Quick Answer
Maintaining a retainer is simple but requires consistency to prevent biofilm buildup. Many users make the mistake of using harsh chemicals that degrade the plastic, leading to structural failure.
The safest daily method involves lukewarm water and a dedicated cleaning agent. Avoid hot water, as it warps the fit, and stay away from standard toothpaste which acts like sandpaper on clear acrylic.
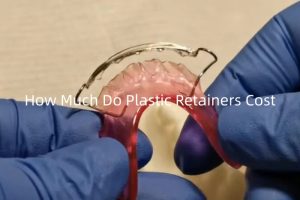
What Retainers Are
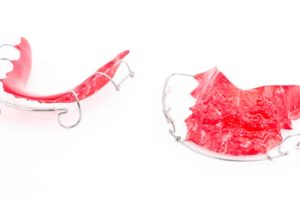
Retainers are custom-made orthodontic devices designed to hold teeth in their new positions after braces. From a B2B perspective, these represent a significant investment for the end-user. Whether they are clear Essix styles or wire Hawley types, the porous nature of the materials means they act as magnets for calcium deposits and bacteria. Understanding the material science behind these devices is the first step in providing the right maintenance solutions to your bulk buyers.
How Often to Clean Them
Hygiene is a daily commitment. Every time a retainer is removed from the mouth, it should be rinsed. A deep soak should occur at least once a day. For dental distributors, educating clients on this frequency reduces complaints about “defective” materials that are actually just dirty. Consistent cleaning prevents the calcification of saliva, which is much harder to remove once it hardens into tartar.
The Safest Daily Cleaning Method
The gold standard is using a pH-balanced soaking solution. We recommend a soft brush to physically dislodge debris, followed by a chemical soak. This dual-action approach ensures both the visible and microscopic threats are handled. Using products specifically formulated for dental polymers protects the integrity of the appliance while ensuring a high level of disinfection.
What to Avoid
| Item to Avoid | Reason | Professional Alternative |
| Boiling Water | Warps and ruins the custom fit | Lukewarm or cool tap water |
| Standard Toothpaste | Abrasive particles scratch the surface | Mild, clear liquid soap |
| Bleach/Alcohol | Dries out and cracks the acrylic | Specialized cleaning tablets |
| Hard Brushes | Create micro-scratches that hide bacteria | Soft-bristled orthodontic brushes |
Why Cleaning Your Retainer Matters More Than You Think?
Ignoring retainer hygiene causes more than just bad smells; it creates a breeding ground for systemic health issues. For businesses, providing clean solutions means protecting your reputation and your customers’ well-being.
Dirty retainers harbor Streptococcus and Candida, leading to oral infections that can compromise orthodontic results. Proper cleaning extends the life of the product, saving money for both providers and end-users.
Bacteria, Plaque, and Odor Buildup
The mouth is home to millions of microorganisms. When a retainer sits in the mouth for 8 to 22 hours a day, it collects a layer of biofilm. If not removed, this biofilm mineralizes into plaque and eventually tartar. This buildup is the primary source of the “locker room” smell many patients complain about. For B2B buyers, offering a solution that targets this biofilm is essential for high customer satisfaction scores.
Health Risks of Dirty Retainers
A neglected retainer is a biohazard. Research shows that pathogens can migrate from the dental appliance into the bloodstream through small cuts in the gums. This can lead to gum disease (gingivitis) or even more severe respiratory issues if bacteria are inhaled. By promoting high-quality orthodontic supplies, you are helping your clients avoid these medical complications while ensuring their smile stays healthy.
How Poor Cleaning Shortens Retainer Life
Retainers are made of medical-grade plastics and metals, but they are not indestructible. Accumulated tartar makes the material brittle. When a user tries to scrape off the buildup, they often crack the acrylic. Furthermore, the acid produced by bacteria can etch the surface of clear retainers, making them look cloudy and old long before their time. Replacing a retainer is expensive, so preventive maintenance is the best economic choice.
Real-life Mistakes I See All the Time
I often see patients who think they are being extra clean by using mouthwash to soak their retainers. Most mouthwashes contain alcohol or blue dyes. The alcohol dries out the plastic, causing it to snap, while the dyes can permanently stain a clear Essix retainer. Another common error is leaving the retainer on a sunny windowsill. The UV rays and heat are a recipe for warping. As a supplier, clear communication on these “don’ts” adds value to your service.
Know Your Retainer First: Different Types Need Different Care?
Different materials react differently to cleaning agents, so a “one size fits all” approach often fails. Buying the wrong cleaning supplies for a specific retainer type leads to material degradation and unhappy clients.
Clear plastic retainers require gentle chemical cleaning, while metal-based Hawley retainers need care for the solder points. Understanding these nuances allows you to stock the right products for every patient demographic.
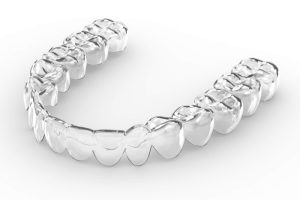
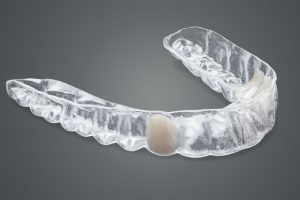
How to Clean Clear Plastic Retainers (Essix / Invisalign-Style)
These are the most popular retainers today due to their near-invisibility. However, they are also the most fragile. They are made of a thin thermoformed plastic that is highly susceptible to scratching. You should never use a brush with stiff bristles on these. Instead, rely on effervescent soaks that use oxygenation to lift debris. This keeps the plastic crystal clear and prevents the “yellowing” effect that makes them look unappealing.
How to Clean Hawley Retainers (Wire + Acrylic)
Hawley retainers consist of a plastic base and metal wires. The challenge here is the junction where the wire meets the plastic. Bacteria love to hide in these crevices. You can use a soft brush more effectively here than on Essix types, but you must be careful not to bend the wires. If the wire is adjusted even slightly during cleaning, the retainer will no longer fit properly, requiring a professional laboratory repair.
How to Clean Permanent / Fixed Retainers
Fixed retainers are glued to the back of the teeth and cannot be removed. This makes them a “plaque trap.” Users must use floss threaders or interdental brushes to get underneath the wire. For these customers, recommending specialized oral care tools is vital. Because they can’t be soaked, the mechanical action of cleaning is the only defense against cavities forming around the bonding material.
Comparison Table of Retainer Types
| Feature | Essix (Clear) | Hawley (Wire) | Fixed (Permanent) |
| Material | Clear Plastic | Acrylic & Metal | Stainless Steel Wire |
| Cleaning Difficulty | Moderate | High (due to wires) | Very High |
| Main Risk | Warping/Scratching | Wire damage/Corrosion | Plaque/Calculus buildup |
| Best Tool | Soaking Tablets | Soft Brush + Soap | Floss Threaders |
How Often Should You Clean Your Retainer? (Daily vs Deep Cleaning)?
Frequency is the secret to longevity, yet many users wait until they see visible dirt before acting. For B2B distributors, selling a “routine” rather than just a “product” increases the volume of repeat orders for consumables.
Daily cleaning removes soft debris, while weekly deep cleaning tackles the invisible pathogens and mineral deposits. A consistent schedule prevents the need for aggressive scrubbing that can damage the appliance’s surface.
Daily Cleaning Routine (Best Practice)
The best time to clean a retainer is immediately after waking up. Overnight, the mouth becomes dry, and saliva proteins stick to the retainer. If you let it dry out in a case without cleaning it first, those proteins harden. A quick 30-second brush with cool water and a mild soap is the baseline. This keeps the bulk of the bacteria at bay and ensures the retainer feels fresh when it is time to put it back in.
Simple Steps
First, rinse the retainer under cool tap water to remove loose saliva. Next, apply a small amount of non-abrasive cleanser. Use a soft brush to reach the interior “wells” where the teeth sit. Finally, rinse again and either place it back in the mouth or store it in a ventilated case. This simple loop is the foundation of oral health for anyone wearing an orthodontic device.
Tools You Already Have
You don’t always need high-tech gear for daily care. A basic soft toothbrush (not the one you use for your teeth) and a bottle of clear, unscented dish soap work wonders. The dish soap is designed to cut through grease and proteins without being abrasive. However, warn your clients to avoid soaps with heavy perfumes or lotions, as these can leave a nasty taste on the plastic that lingers for hours.
Weekly Deep Cleaning Routine
Once a week, a more intense intervention is required. This is where chemical soaks come into play. Even with daily brushing, microscopic layers of tartar begin to form. A 15-minute soak in a specialized solution breaks down these hard deposits. For businesses, this is the perfect opportunity to bundle retainer cases with cleaning supplies, offering a complete hygiene kit to the end consumer.
Best Way to Clean Retainers at Home (Step-by-Step Guide)?
A standardized cleaning process reduces the risk of accidental damage and ensures a professional level of sanitation. When you provide your clients with a clear roadmap, you reduce the support tickets related to “broken” or “cloudy” products.
Following a three-step process—rinse, brush, and soak—provides the most comprehensive results. This method balances mechanical removal of plaque with chemical disinfection to maintain a pristine oral environment.
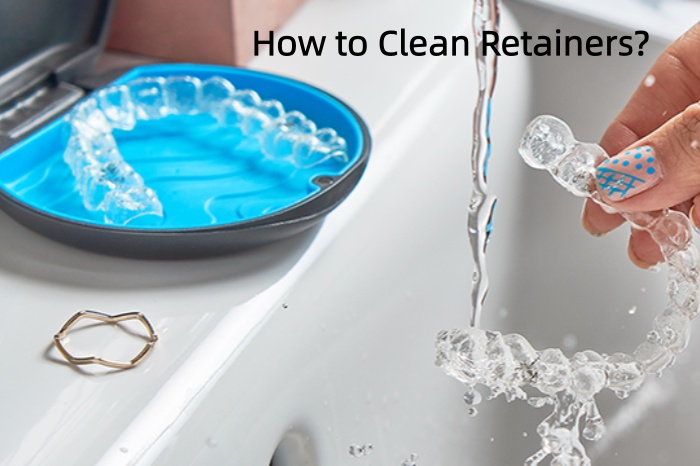
Step 1: Rinse Immediately After Removal
As soon as the retainer comes out of the mouth, it is covered in “wet” biofilm. This is the easiest stage to clean. If the user puts the retainer in a box while it is still wet with saliva and lets it dry, they are essentially “baking” the bacteria onto the surface. A simple 5-second rinse under the tap prevents this hardening and makes the subsequent steps much more effective.
Step 2: Gentle Brushing (What Brush to Use)
The choice of brush is critical. Many people use their regular medium-bristle toothbrush, but this is too harsh for clear plastics. We recommend a dedicated orthodontic brush or an ultra-soft infant toothbrush. The goal is to sweep away the loose material, not to scrub. Use circular motions and pay special attention to the deep grooves that mirror the chewing surfaces of the teeth.
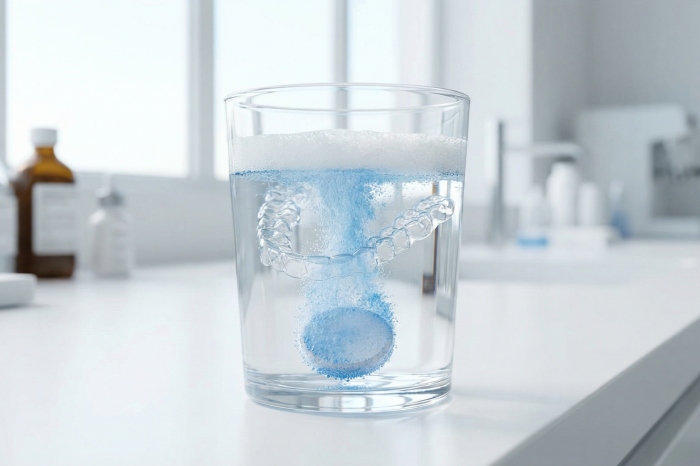
Step 3: Soak for Deep Cleaning
After brushing, the retainer might look clean, but it isn’t sterile. Submerging it in a cleaning solution allows the liquid to penetrate the pores of the acrylic. This step is non-negotiable for anyone who wants to avoid bad breath. Using a specialized soak also helps to reach the areas that a brush simply cannot touch, such as the tiny gaps in a Hawley retainer’s wirework.
Cleaning Workflow for B2B Clients
| Step | Action | Benefit |
| 1. Rinse | Use cool water immediately | Prevents biofilm hardening |
| 2. Brush | Use soft bristles + mild soap | Removes physical debris |
| 3. Soak | 15 mins in cleaning solution | Kills 99.9% of bacteria |
| 4. Dry | Air dry in a vented case | Prevents mold and mildew growth |
What Is the Best Retainer Cleaning Solution?
Choosing the right chemical agent is a balance between power and safety. Many common household cleaners are too aggressive for medical-grade polymers, leading to micro-cracks and material failure over time.
Professional cleaning tablets are the superior choice because they are formulated to be “non-oxidizing” or “mildly oxidizing,” which protects the metal and plastic. They provide a deeper clean than soap alone while being much safer than bleach.
Retainer Cleaning Tablets: Why Dentists Recommend Them
Dentists and orthodontists prefer tablets because they offer a controlled dose of cleaning agents. There is no guesswork involved for the patient. These tablets usually contain sodium bicarbonate for cleaning and citric acid for effervescence. This combination creates a bubbling action that mechanically lifts stains. For a B2B buyer, stocking these tablets ensures that your customers are using a product that won’t cause warranty issues with the retainers themselves.
How They Work
When the tablet hits the water, it releases active oxygen. This oxygen travels into the tiny pores of the retainer material, breaking the chemical bonds of the stains and the protective walls of the bacteria. It’s a hands-off way to get a lab-quality clean at home. This is especially important for the older demographic or those with limited dexterity who might struggle with precise brushing.
What They Remove That Brushing Can’t
Brushing is great for large particles, but it can’t kill bacteria or remove deep-set stains. Cleaning tablets use enzymes to break down proteins and calcium-fighting agents to dissolve early-stage tartar. They also contain deodorizers that neutralize the sulfur compounds produced by mouth bacteria. This ensures the retainer doesn’t just look clean, but also smells fresh, which is a major selling point for the end consumer.
Can You Use Denture Cleaning Tablets for Retainers?
This is a frequent question in the B2B space. The short answer is: sometimes, but with caution. Some denture cleaners are too abrasive or contain chemicals that can turn the metal on a Hawley retainer black or make clear plastic turn yellow. It is always safer to recommend tablets specifically designed for retainers. These formulas are generally gentler and specifically tested on the types of plastics used in modern orthodontics.
Common Retainer Cleaning Mistakes to Avoid?
The most expensive mistakes in retainer care are often born from good intentions, such as trying to “sanitize” with heat. Educating your clients on these pitfalls can save thousands in replacement costs and build long-term trust.
Heat, abrasives, and neglect are the three biggest enemies of any dental appliance. Avoiding these common errors will double the lifespan of the product and keep the patient’s oral health in peak condition.
Why Hot Water Can Ruin Your Retainer
Clear retainers are made of “thermoplastic,” meaning they are shaped using heat. If a user rinses them in boiling or even very hot water, the plastic “remembers” its original flat state and starts to warp. Even a millimeter of change in the shape means the retainer will no longer fit. This often results in a painful experience for the patient or, worse, their teeth shifting back to their original positions.
Why Toothpaste Is a Bad Idea
Toothpaste is designed to clean enamel, which is the hardest substance in the human body. To do this, it contains abrasives like silica. While these are fine for teeth, they act like sandpaper on the relatively soft plastic of a retainer. Brushing with toothpaste creates thousands of microscopic scratches. These scratches make the retainer look cloudy and, more importantly, provide a perfect “apartment complex” for bacteria to hide in.
Why Skipping Cleaning for “Just One Day” Adds Up
Bacteria multiply exponentially. Skipping a single day of cleaning allows a layer of plaque to harden into tartar. Once it becomes tartar, it cannot be removed by simple brushing; it requires a professional ultrasonic cleaning or a very long soak. This “snowball effect” is why many retainers look disgusting after just a few months. Consistency is the only way to maintain the structural and aesthetic integrity of B2B dental products.
The Danger of Harsh Chemicals
Some people try to use bleach or high-strength alcohol to “kill everything.” This is a mistake. Bleach can degrade the polymer chains in the plastic, making it brittle and prone to snapping. Alcohol can have a similar effect, drying out the material. In Hawley retainers, these chemicals can also cause the solder points to corrode, leading to the metal wires falling off the acrylic base.
How to Remove White Buildup, Odor, and Stains from Retainers?
Once a retainer is heavily soiled, standard cleaning isn’t enough. You need specific protocols to restore the appliance without damaging it, which is a key service area for dental professionals.
White film is usually calcium buildup, while yellowing often comes from pigments in food or drink. Addressing these issues early prevents permanent damage and keeps the user’s confidence high.
How to Get Rid of White Film on Retainers
That stubborn white film is “calculus” or “tartar.” It is essentially mineralized saliva. The best way to remove it at home is a gentle acid soak. A mixture of half white vinegar and half water can help dissolve the minerals. Soak the retainer for 15-20 minutes, then brush gently. However, for bulk buyers, providing a professional descaling solution is a more reliable and patient-friendly recommendation.
How to Remove Bad Smell from Retainers
Bad smells are caused by volatile sulfur compounds produced by anaerobic bacteria. If a retainer smells, it means there is an active colony of bacteria living in the pores. An extra-long soak in a specialized cleaning solution is the best remedy. Some patients find success with a brief soak in a baking soda and water paste, which neutralizes the odors. However, if the smell persists, it usually means the retainer has micro-cracks that are harboring deep-seated rot.
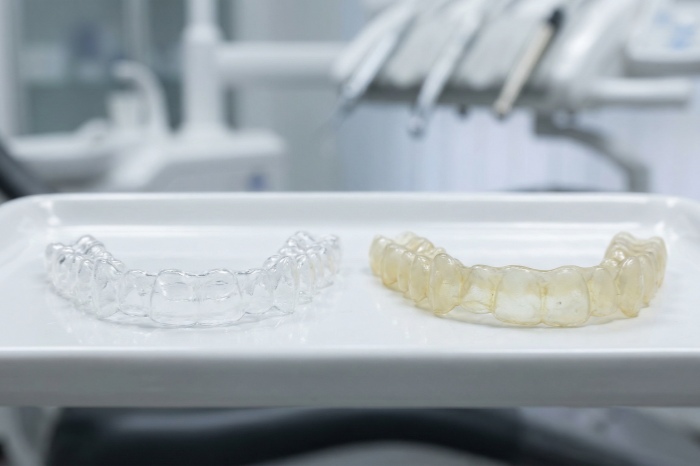
How to Clean Old or Yellowed Retainers
Yellowing is often a sign of aging or exposure to coffee, tea, or soda. While you can’t always reverse 100% of the yellowing, a high-quality whitening soak can significantly improve the appearance. It’s important to manage customer expectations here: plastic is porous, and some stains are permanent. If the retainer is structurally sound but looks terrible, it might still be time for a replacement for purely aesthetic reasons.
Restoration Checklist
| Problem | Likely Cause | Recommended Solution |
| White Spots | Calcium/Tartar | Vinegar soak or Descaler |
| Foul Odor | Bacterial Biofilm | Oxygenating tablets |
| Yellow Tint | Food Stains/Aging | Deep soak in specialized cleanser |
| Cloudiness | Micro-scratches | Prevention (Stop using toothpaste) |
How to Store Your Retainer to Keep It Clean?
Storage is just as important as cleaning. Many retainers are lost or contaminated because of poor storage habits, which is a major pain point for B2B clients who have to manage replacement orders.
A clean retainer should always be stored in a dry, ventilated environment. Keeping it away from heat sources and pets (who love the smell of saliva) is essential for maintaining hygiene and physical safety.
Best Retainer Storage Habits
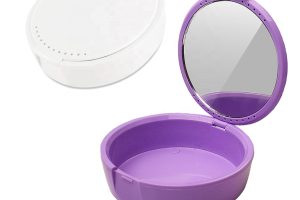
The “wet” environment of a closed, unventilated box is a paradise for mold. Always ensure the retainer is dry before long-term storage, or use a case with air holes. For our B2B partners, we emphasize the importance of providing high-quality ventilated cases with every retainer. This small addition to your product line significantly reduces the incidence of “moldy” complaints from end-users.
When to Avoid Tissue or Pockets
The most common way retainers are lost is by wrapping them in a napkin at a restaurant. They look like trash and get thrown away. Similarly, putting a retainer directly in a pocket leads to it being crushed or covered in lint and dirt. Educating patients to carry their case at all times is the simplest way to protect their investment. A “case or face” rule should be standard advice for all orthodontic patients.
Keeping the Case Clean
A clean retainer in a dirty case is a waste of time. The case itself should be washed daily with warm soap and water. Every week, it should be disinfected using the same cleaning tablets used for the retainer. This prevents the “re-contamination” loop where a patient cleans their retainer perfectly only to put it back into a box filled with old bacteria and dust.
When to Replace Your Retainer (And Signs It’s Time)?
Nothing lasts forever, and knowing when a retainer has reached the end of its functional life is crucial for clinical success. For a business, this creates a natural lifecycle for product replacement and repeat sales.
A retainer that no longer fits or is physically compromised cannot do its job. When you see cracks, persistent odors, or a loose fit, it is time to order a new one from your dental lab partner.
Warning Signs Your Retainer Is Too Dirty or Damaged
The first sign is usually a change in fit. If the retainer feels tight or loose in specific areas, the material has likely warped or stretched. Another sign is “pitting” or small holes in the plastic. These are hotspots for bacteria and cannot be cleaned effectively. If a user has a persistent sore in their mouth, the retainer might have developed a sharp edge from a micro-crack.
Cracks
Cracks are structural failures. They often happen because the plastic has become brittle due to age or improper cleaning chemicals. A cracked retainer does not apply the correct pressure to the teeth, which can lead to orthodontic relapse. Once a crack appears, the retainer should be replaced immediately. Trying to glue it back together is dangerous, as most glues are toxic and will not hold up in the moist environment of the mouth.
Permanent Odor
If a retainer still smells bad after a deep 24-hour soak in a professional solution, the bacteria have penetrated too deep into the material. At this point, the retainer is a health risk. This is common in retainers that are several years old. It is much better for the patient to invest in a fresh, clean appliance than to continue putting a contaminated one back into their mouth every night.
Poor Fit
If the user hasn’t worn their retainer for a few days, their teeth might have moved, or the retainer itself might have warped. Forcing a poorly fitting retainer onto the teeth can cause tooth pain or even root damage. As a supplier, you should encourage regular check-ups to ensure the fit remains optimal. Providing high-quality replacement options is part of a comprehensive dental care strategy.
Final Thoughts: Clean Retainers = Healthy Smile?
Maintaining a clean retainer is a simple habit that protects a major financial and dental investment. By following these professional steps, your clients will enjoy better oral health and longer-lasting appliances.
Consistency is the key to success in any hygiene routine. We encourage you to implement these standards and share this knowledge with your customers to ensure the best possible outcomes for their smiles.
Thank you for trusting ITS Dental Care Products with your orthodontic needs. Would you like me to prepare a customized bulk pricing quote for our professional-grade retainer cleaning tablets and ventilated storage cases?
You may also interested in: